I’m a little giddy today because we’re headed on a little vacation this weekend! We’re headed down south to warmer weather (not that it’s been cold here in Logan, Utah), or should I say, “sweltering weather,” where it’s supposed to be right up around 100 degrees while we’re there. That’s alright with me, though, because I plan to live in the pool.
Since I’m pregnant, there’s been no working out or eating healthy to do (one of my favorite perks), so all I had to do to get ready was just slap on a layer of my favorite fake tan, and grace my usually bare nails with a fresh, summery manicure.
While browsing Pinterest for some inspiration, I fell in love with watercolor nails. You can literally use any colors you want, and it’s so easy! The only special tool you need is a sandwich bag, and I’m pretty sure everyone has those on hand. (See what I did there? Eh?)
Let me show you how quick and easy this is!
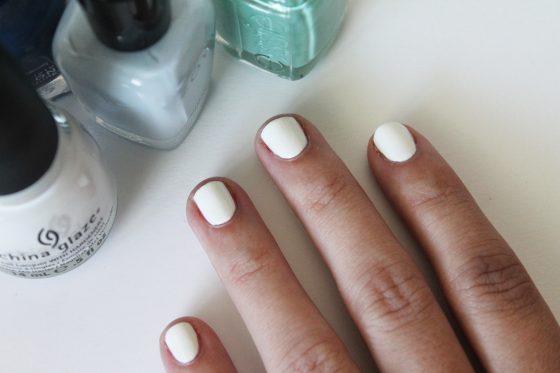
1. Start with white nails
Start off with white nails (I’m using China Glaze White On White), and I painted mine the night before to make sure they were completely dry.
From experience, I’ve figured out that if the nails are still a little wet, it’ll cause problems with the rest of the process.
Start with a white base
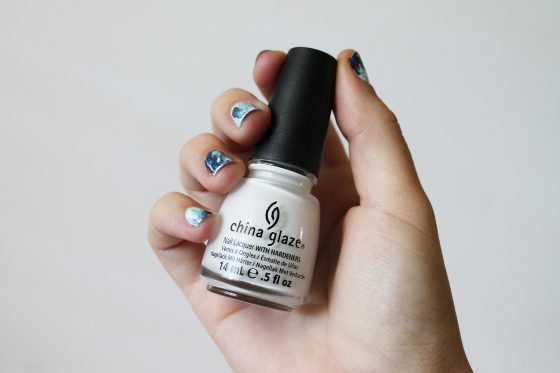
China Glaze White on White
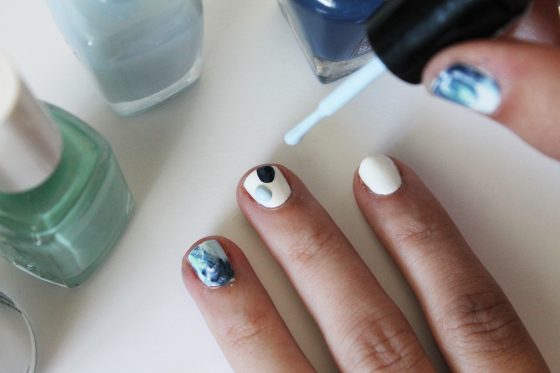
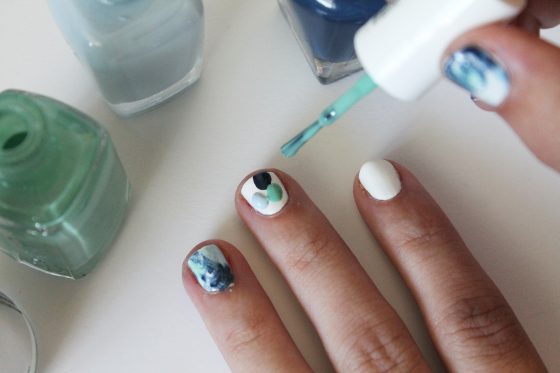
2. Apply your colorful blobs
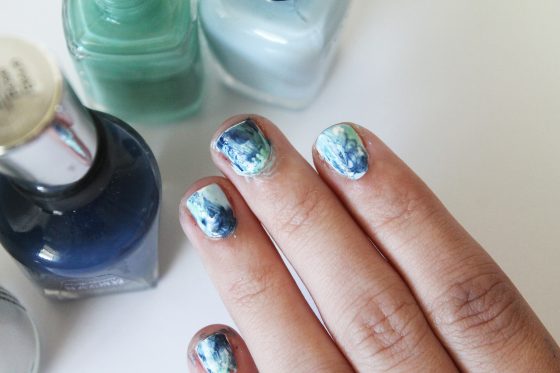
Working one nail at a time, put a fairly generous blob of each color you want to use on the nail. I put the blobs in different areas so that the nails don’t all turn out looking similar.
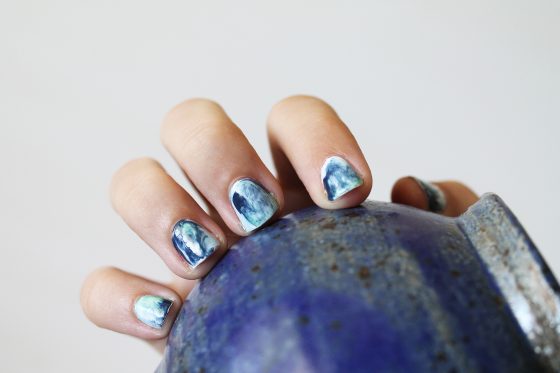
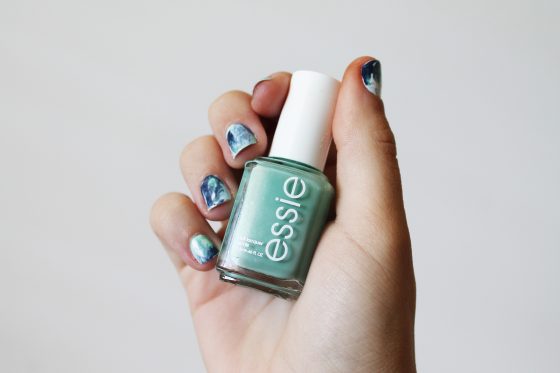
I wanted mine to resemble pools of water, so I used two blues — Zoya Blu and Sally Hansen Blue Rose (discontinued) — and a turquoise called Essie Turquoise and Caicos.


Sally Hansen Blue Rose
Zoya Blu
Essie Turquoise and Caicos
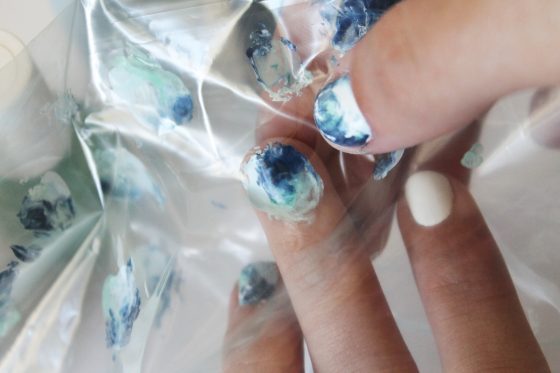
3. Grab your sandwich bag
Once your blobs are in place, it’s time to grab your sandwich bag. Open the bag, stick your finger inside, and lightly press your nail against the plastic, and sort of wiggle the bag around to mix the colors together.
It’s okay if you make a mess on your cuticles; we’ll clean those up later.
4. Time for top coat
When all of your nails are done, grab your favorite top coat (mine is Sally Hansen Mega Shine), and coat your nails. Then let them completely dry.
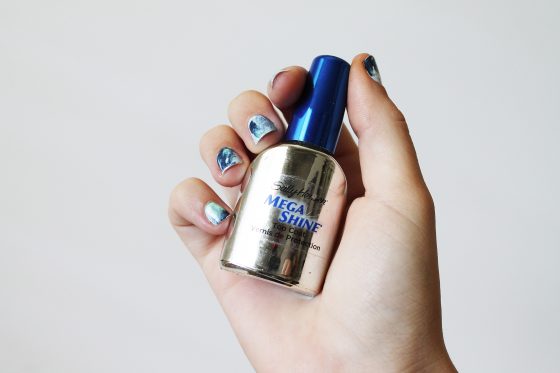
Sally Hansen Mega Shine Top Coat
5. Clean up your cuticles
There are plenty of different techniques out there to get polish off your cuticles.
You can use a Q-tip and nail polish remover, but I don’t ever really do that because I don’t think it’s that effective, and there’s usually still a mess left over.
I like to wait for everything to completely dry, so like a few hours. Then I’ll make myself a nice bubble bath, and after my hands have soaked in the warm water for a while, I’ll put on my exfoliating gloves, rub around my cuticles, and everything comes right off.
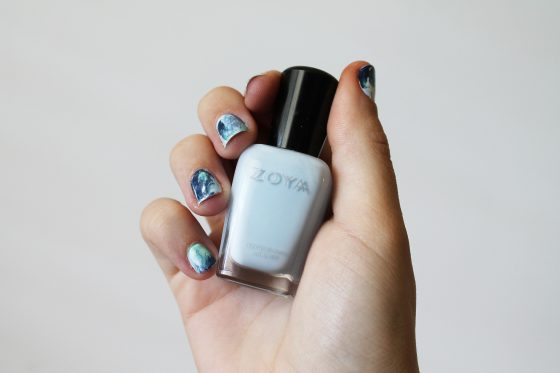
Voila! A perfect manicure. And a relaxing bubble bath!
Do you have any fun vacation plans this summer? Where are you headed?
The post, “A Refreshing Watercolor Nail Tutorial to Quench Your Thirst for Color,” first appeared on Makeup and Beauty Blog | Makeup Reviews, Swatches and How-To Makeup.
from Makeup and Beauty Blog | Makeup Reviews, Swatches and How-To Makeup http://www.makeupandbeautyblog.com/nails/watercolor-nail-tutorial/
Alt Source: Startifacts Nose Hair Trimmer
from
http://startifacts.tumblr.com/post/146421640809
No comments:
Post a Comment